Shirt and tie


This Christmas, my sister asked us specifically to avoid buying toys for her two sons. They were overflowing with toys (I stayed in their guest bedroom, which resembled much more of a Toys R Us warehouse than a bedroom.)

I stumbled upon this tie tee-shirt on omi creates and decided it was the perfect blend of "crafty" without overcommitting myself to a homemade Christmas present that may not ever get completed...


I bought some basic long sleeve (Ottawa in the winter is coooold!) t-shirts from Old Navy and machine appliquéd a tie directly on the front of two shirts: one for my 2-year old nephew, Max, and one for a my 6-month old nephew, Ryker.  I also decided to make some bow-tie shirts with a little pleat in the bow.

Without the monkey-suit-feel of a tux, Max was able to add a little pizazz to his outfit!

Read more...

Christmas Reindeer Pops

Just a quick post to wish everyone a Merry Christmas and to share about these fabulous reindeer pops that my friend Magda made. Aren't they adorable?


The head is made with an Oreo truffle, which is just a simple blend of Oreos and cream cheese.

Hope you all have a wonderful Christmas filled with love and chocolate!

Read more...

Fabric ornaments


December is always filled with mixed emotions of exciting holiday celebration and oh-my-goodness-I'm-too-busy!

I love the idea of making Christmas gifts. After I took the snap coin purse class, I had originally thought to make a few as gifts for friends. Unfortunately, the workroom ran out of purse frames... So I went on a hunt for another easy Christmas project.

Vanessa Christenson posted a great tutorial on her blog for fabric ornaments and I was sold. I picked four different print fabrics and decided to mix it up with some Kona solids.


The project is super easy. I got really good at sewing curves on the machine, and eventually got used to the hot glue gun and stopped burning myself...

Some lucky friends and family will be getting a fabric ornament for Christmas depending on how many I manage to make! I just dropped off my first batch at the workroom for the awesome pretty ladies that work there! In exchange, I stuffed my face with baked brie at this month's Stitch and Bitch. I think it was fair tradeoff!

There are less than two weeks left until Christmas and I've still got a couple projects to finish! Hope you're all having a great December, whether you're rushing to get some crafty projects done or braving the shopping malls!

Read more...

Pillowcase Dresses


Those of you who know me well, know of my intense love for jokes -- the terrible ones.

So here's a great one to kick-start this post:

"Corduroy Pillowcases Make Headlines!"

This past weekend was the Little Dresses for Africa event. Emily (and hubby) did a fantastic job of organizing the event, with close to 30 participants sewing dresses from pillowcases! Jenn and I were so glad to be helping out. We taught several newbie sewers the ins and outs of the basic sewing machine and then they each created a beautiful dress from a basic pillowcase!

It took a little while to get the hang of things, but a super-size thank-you to all the great ladies that came out! Your patience, enthusiasm and dedication were most appreciated!


The room was beautifully decorated with tissue paper pom poms and the cutest little "trim station" with multicoloured ribbons, thread, trim etc. The snack station was overflowing with delicious treats: cookies, rum cake, cream puffs, mini muffins.

Emily made the cutest little "button" shortbread cookies as thank you favours.


I'm going to clean up the tutorial that I developed for the class and make a link available on the site! You can sew your own pillowcase dress and send it to Little Dresses For Africa, and maybe even use the tutorial to sew a summery tank top for yourself ;)

Read more...

Little dresses for Africa

My dear friend, Emily, is hosting a wonderful event: Little Dresses for Africa.

It's a sewing event where you can learn some basic sewing techniques, sew a super cute little girl's dress using a pillowcase, bedazzle it to your liking, and then donate it to Africa. Did I mention there will be delicious baked goods?

Jenn and I will be teaching the sewing workshops! For more information, click on the image below. No sewing experience necessary!


Read more...

The chewiest cookies in the world


In my last post, I raved about Elizabeth Hartman from the blog Oh, Fransson!

This post gives a shout-out to Joy, from the food blog Joy the Baker. Joy's blog is full of great recipes accompanied by great photos of her food. She's got a great quirky personality that shines through in her posts, always really fun reading. Plus, she has freckles. Freckles are cool.

I've had Joy's Chewy Molasses Chocolate Chip Cookies recipe bookmarked for a while now. I'm not usually on the hunt for a cookie recipe, since my usual recipe is so tasty, and probably the healthiest you can get given that it's a chocolate chip cookie. But when my good friends Tammy and Trev were so kind as to lend us a whole whack of baby stuff, it called for an extra special cookie recipe. The healthy whole wheat ones just wouldn't cut it.

The best thing about this cookie recipe is that you don't have to remember to soften the butter to room temperature. It calls for melted butter. (You don't have to keep the pot on the stove until the entire cup of butter is melted. Once it's about 2/3 melted, turn the heat off and swirl the melted butter around until the last 1/3 melts.)

The next best thing about the recipe is that it uses molasses. And although I don't always have molasses in my house, buying a small carton for this recipe guarantees that I will make this recipe another 3 or 4 times. The molasses stays good in the cupboard for... well, for a very long time.


I've made a couple really tiny tweaks to Joy's recipe. I don't have bread flour in the house, so I used all-purpose flour. Use 2 1/4 cups of all purpose flour. Instead of 1 egg and 1 egg yolk, I just use two eggs. Why waste the egg white? I also find that 1 1/2 cups of chocolate chips is plenty. Finally, I skip the sea salt, but I bet that would be a tasty addition if you're not planning on bringing them to an office potluck where the sea salt will likely go unappreciated.

The result is a truly magical cookie. Like the kind you get from a gourmet cookie shop. Leave lots of room between the balls of cookie dough because it really spreads out to a thin, chewy cookie. I highly recommend the use of a small ice cream scoop (I have this one). If you don't own one (or two), add it to your Christmas list! It's a huge time-saver, not to mention an integral part of portion control...


Read more...

Kitchen window quilt


If you love quilt blogs, 
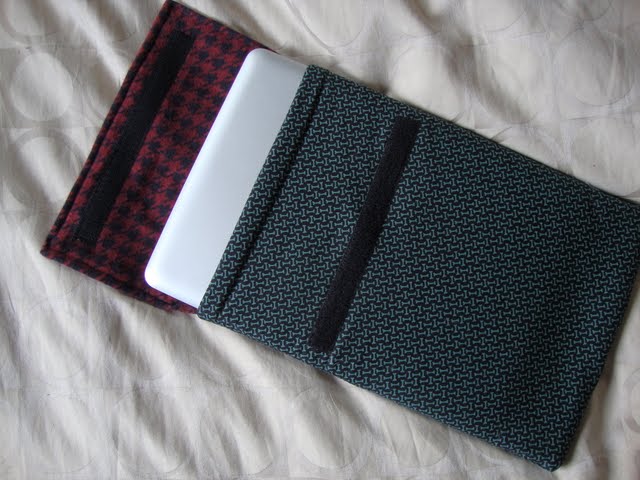
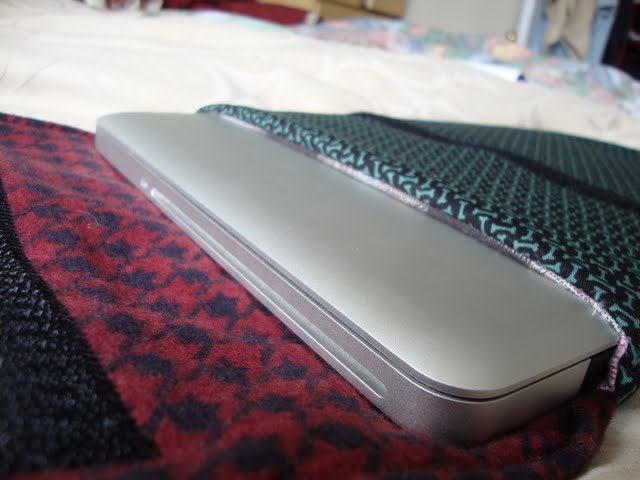
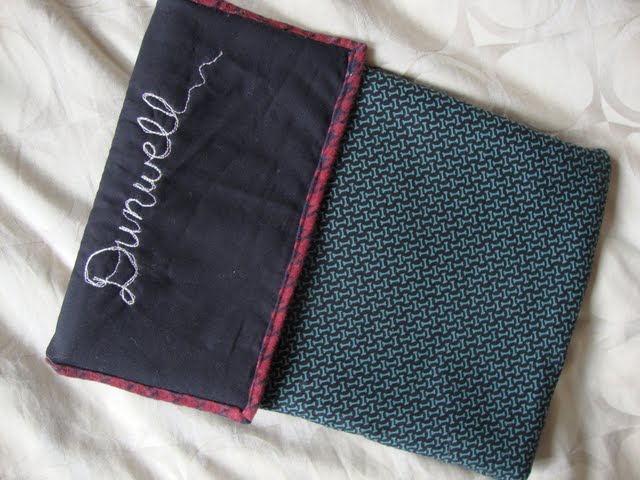
Oh, Fransson! is a must-read. Elizabeth Hartman does such a great job keeping her blog clean and crisp, with lots of inspiration and step-by-step tutorials (like the one I used for the laptop cozy.) I bought her first book "The Practical Guide to Patchwork" and recently found out she is writing a second quilting book called "Modern Patchwork".

This is the only quilt book I've purchased to date. Usually, I would take a quilting class at the workroom, use an online tutorial, or figure it out on my own. But classes don't always work with my schedule, and they can get a bit pricey. Online tutorials are not always complete, and having to figure out all the math (how much fabric, how big to cut each piece, how big is my seam allowance again?) is quite a chore, so I ended up buying Elizabeth's book whilst searching for a good modern quilt design to make for my mother in law. My mother in law is a great supporter of my quilting hobby; every year since I've found the workroom, she has given me a giftcard in my stocking. It never takes long for me to spend the gift cards...

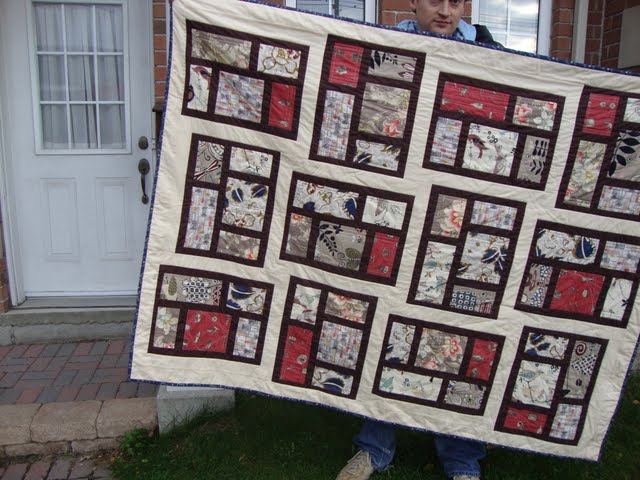
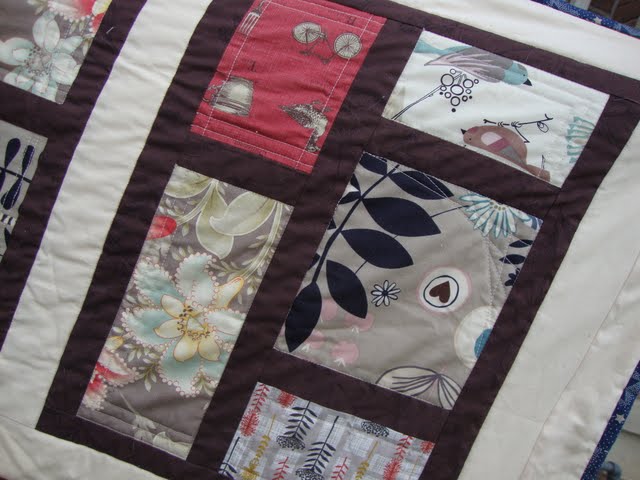
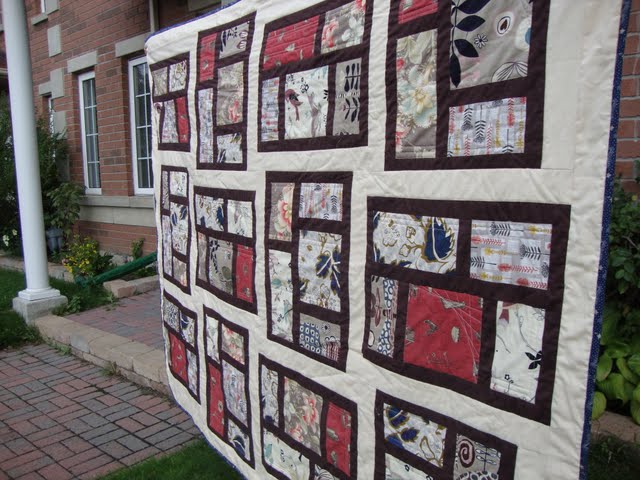
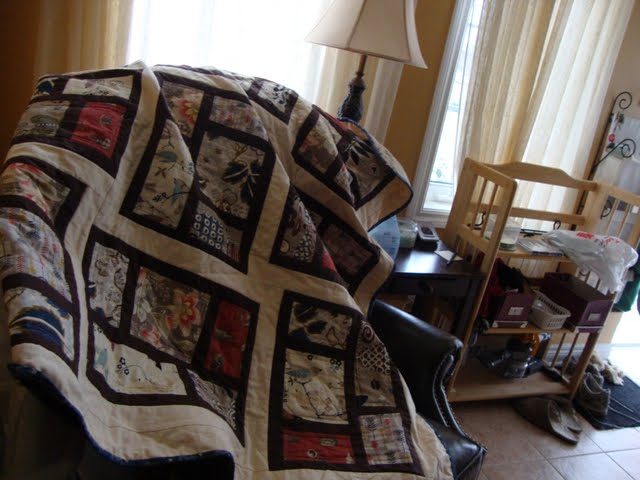
When I saw the "kitchen window" quilt design in Elizabeth's book, I knew it would be the perfect quilt for me to make. I didn't want to fuss too much about matching fabrics, making sure there's enough contrast and coordination, so this pattern works perfectly. Each chosen fabric is framed (like a kitchen window) so I was able to pick a loose colour palette and just go nuts buying really pretty fabric.

The feature fabrics I chose were generally things you'd see outside your window: birds, bugs, leaves, flowers.

I used:

Cut Out & Keep by Heather Moore
June Bug: Songbirds by Alexander Henry
June Bug: Malt Bugs and Birds by Alexander Henry
La Petite Ecole in Faded Red Word by French General for Moda
Martinique: Bisque in Brown Floral by 3 Sisters
Westminster Navy Patterned Floral by Fabric Freedom

I framed them with deep-brown Evening Mist by Sentimental Studios and then kept the borders clean with a cream Kona Solid.

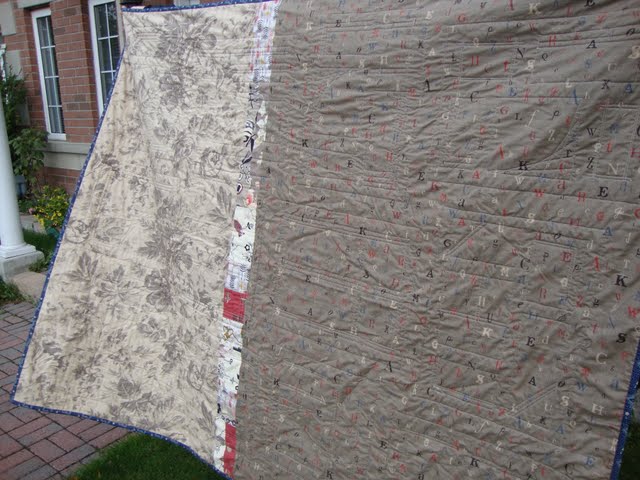
This quilt came together relatively quickly; I mostly stitched-in-the-ditch to machine quilt it together with a little bit of artistic stitching inside each frame. I did a bit of a scrappy back and then bound it with a blue and gold star fabric.

I gave the quilt to my mother in law in October for her birthday. She loved it. It's definitely a quilt pattern that I would try again!


Read more...

Japanese Snap coin purse


For my birthday back in July, one of my most stylish friends, Mel, gave me a stash of beautiful Japanese fabrics. Last year, I made a bunch of zippered pouches for the craft sale at my church. Mel had mentioned that this fabric would make super cute change purses.

I decided it would be perfect to take the snap coin purse class at the workroom and learn how to make these change purses properly. I always do a better job when I take a class.  The pattern that Reva designed for the class has a pretty little ruche to give the purse a little body.


I chose the gorgeous teal Japanese fabric and fussy cut it so that there were cherry blossoms showing on both sides. For the lining, I used leftover fabric from my pleated marble dress. Now I just need to do what Karyn did a couple years ago and assembly-line the whole process to make a whole bunch as Christmas gifts! Or hope that there's another craft sale at my church again!


Read more...

Multi-tasker Tote for baby


My friend, Julie, showed me her fabulous Multi-tasker tote by Anna Maria Horner and noted how perfect it was as a baby bag.

My favourite bag to sew is usually the Birdie Sling by Amy Butler, but it's not a great pattern for a baby bag.

This Multi-tasker has nice big pockets on the outside (perfect for bottles?) and the opening to the bag is nice and wide. The biggest downside of the Birdie Sling is probably its small opening: I find myself digging around for stuff, unable to open the bag wide enough to find my smaller items.


I had just enough nani iro oil cloth left over from my rain jacket expansion to use as the exterior fabric. I added some bright yellow piping to make the pockets really stand out, and then added an extra zippered pocket to the inside of the bag. I also wanted the straps to be extra comfy so I widened it slightly and added a thick interfacing.


I'm so proud of this bag. There are so many options for customizing; I think the next time I make this I will also add an exterior pocket. If I ever get to set up shop teaching some sewing classes, this is definitely my first pick: it's loaded with easy basics as well as lots of room for creative additions!


Read more...

Clothing expansion

When women talk about expanding their wardrobe, we are usually talking about the exciting prospect of adding the latest and greatest new fashions to our closet.


I am expanding my clothes. But not as described above. Dustin and I are expecting a baby girl in February (yay!) and I am literally expanding my clothes. I've altered several pants already (super easy with all the tutorials out there) and after a crazy drop in temperature in mid September, I set out to alter my fall rain jacket.

Last Christmas, my brothers cleaned out my wishlist from the workroom. One of the items was a meter of nani iro oilcloth. I'm so glad I asked them for it. The workroom no longer has it in stock, and I had it all saved up for a perfect project like this. (I recently used the rest of it on a beautiful Anna Maria bag, but that's another post!)

I cut out a section much wider than I needed and then sewed pleats into it to allow for additional expansion (especially in the midsection.) I lined it with some leftover fabric from my paisley sampler quilt and then finished the neckline with some fuzzy hounds-tooth fabric: gotta have something fuzzy by your chin.

To get a compatible zipper, I went to the Leather and Sewing Supply Depot on Queen West (amazing store for zippers) and asked the lady to find the perfect match.

The best part about this alteration is that I can undo the expansion and eventually use the jacket in its original size again (Oh how I long to be a size small again...)

The downside? The jacket hides the baby bump quite well, and I have noticed a significant reduction in seat-offerings on the subway...


Read more...

Laptop cozy

I've had the wonderful pleasure of enjoying the life with a macbook pro for a little over a year. I've now graciously donated it to Dustin, as we decided he would make better use of it in his last year of his phd studies and especially now that he's teaching a lecture at the University of Toronto. I'm nice that way.

The laptop now sees much more of the world; Dustin brings it everywhere with him. It made sense that I make it a nice laptop travelling case.


I used Elizabeth Hartman's tutorial. Her tutorials are always among my favourites. I have her quilting book and love reading her blog "Oh, Fransson!"

It's tough for me to use fabrics that aren't super girly, vibrant, or whimsical. But I couldn't have Dustin's students laughing at his laptop cozy. I dug out some cute dog-bone fabric and fuzzy red and black hound's tooth fabric. Masculine-cute.


I finished it off with a little personalized stitch.


Read more...

Harvesting basil seeds


As the chilly weather consumes Toronto, our balcony garden is coming to an end. The green tomatoes seem to have given up their quest to reach redness. The little cucumbers and zucchinis have settled as miniatures. But oh, the basil plants are now perfect for harvesting seeds.

We stopped pinching off the basil flowers back in August. The flowers eventually grew to be spiky stalks with pods of seeds.


It's so satisfying to be able to harvest your own seeds! And now that it's getting chilly out, we're hoping to have some indoor basil plants.


It's really amazing how many seeds you get from one tiny pod. And then how many pods are on a stalk. And then how many stalks sprout from one basil plant. We're going to have enough basil seeds for eternity. Or, we share!

If you'd like some basil seeds to plant indoors this season (or to hang onto for spring) leave me a comment sharing how you like to use basil! I'll mail out 3 pouches of basil seeds! Happy Thanksgiving!

Read more...

Basic beets


It's really quite amazing to remember my struggling beet days. When Dustin and I first signed up for the CSA box a couple years ago, we were thrust into a world of root vegetables: oftentimes, beets.

I am now a full blown beet fan. It's a regular favourite of mine to order at a restaurant. (The salted baked beets at Bannock are fantastic.)

This year, two beet plants survived in our garden. The seeds are cute little clusters. Somehow I thought each cluster would yield a few beets... No, one seed cluster equals one beet. Hence, two beets from our garden this year.


At home, I keep it simple: boiled and seasoned. It always turns out great and leaves so many options for adding extra flavours.

I start by boiling the washed, unpeeled beets. Depending on the size, it takes 30 or 40 minutes. When fork tender, drain and peel when they are cool enough to handle. Dice/chop to desired size.


While the beets are still warm, add a generous splash of seasoned rice vinegar (also known as sushi rice vinegar). I like to use Marukan brand.

Serve chilled or at room temperature.


That's it! This basic recipe is how I usually eat my beets at home. I've added tarragon, thyme, cashews, and even sour cream.  I bet some horseradish would be delicious.

For all those beet skeptics, I really think this is the way to eat beets.  The tang in the vinegar really balances the earthy beet flavour.  If you don't have seasoned rice vinegar, use apple cider vinegar. It's equally tasty and would pair well with some diced apples!

Read more...

  © Blogger template Shush by Ourblogtemplates.com 2009

Back to TOP